#

🏎 📡 🌍 F1 World Broadcast Emulator Project 🌍 📡 🏎

Hello! What you've stumbled upon is a personal practice web development project by me, Kyle Geib (TiE23). As the sport of Formula 1 is a passion of mine this is a passion project I assigned myself to become more comfortable with CSS, Redux, TypeScript, and React Hooks. I've probably written 98% of all the CSS I've ever written in my life in this project alone. While I'm not exactly a master (yet) I feel entirely capable of taking design directions from a designer and building the CSS that is needed to create it in the real world. # 独立转播输出(给 OBS 用) 可以把广播画面推到**一个独立的透明输出页**上,通过一个 WebSocket 中继转发,这样 OBS (或任何其它渲染器)可以直接把图形叠到画面上,而控制端继续在普通浏览器标签里操作。 ## 运行 ```bash # 1. 启动前端(控制页和输出页都由它提供) npm start # 2. 另开一个终端,启动 WebSocket 中继(默认端口 8181) npm run relay ``` 然后打开: * **控制端**:http://localhost:3000/broadcast (任何 UI 页面都可以) * **输出端**:http://localhost:3000/output —— 透明、只有图形 ## 在 OBS 里使用 添加一个 **浏览器(Browser)** 源: * URL:`http://localhost:3000/output` * 宽度 `1920`、高度 `1080` * 透明度是自动的(这一页不画任何背景)。按需勾选「源不可见时关闭」 * 建议勾选「场景激活时刷新浏览器」,源重连后中继会把最后一次状态重放给它 ## URL 参数 | 页面 | 参数 | 作用 | | --- | --- | --- | | `/output` | `?debug=1` | 画出 1920x1080 安全框和连接状态角标 | | `/output` | `?ws=ws://host:port` | 指定中继地址(例如局域网另一台机器:`?ws=ws://192.168.1.20:8181`) | | 控制端页面 | `?bridge=0` | 这个标签页不向中继发布状态 | 中继可以用 `RELAY_PORT` / `RELAY_HOST` 配置(默认 `8181` / `0.0.0.0`), 控制端也可以用 `REACT_APP_RELAY_URL` 指向别处。 > **同时只开一个控制端标签页。** 中继允许任意多个 controller 连接,但每个标签页都会发布自己的 > store,两个控制端会互相覆盖状态(输出页就会闪来闪去)。多余的标签页请关掉,或者加上 > `?bridge=0` 让它只当观众。 > > 输出页显示不正常时,先看 `http://localhost:8181/health`:`controllers` 应该是 1、 > `hasState` 应该是 `true`;输出页加 `?debug=1` 会画出连接状态和「最后一次收到数据」的时间。 ## 实现 * `src/components/Output/OutputRoute.tsx` —— 无外壳的输出页:只渲染计时榜、字幕和 logo, 按窗口等比缩放,背景透明。 * `src/components/Output/BroadcastBridge.tsx` —— 挂在外壳里;节流(约 20Hz)把广播相关的 Redux 切片推给中继。 * `src/features/outputChannel/` —— 自动重连的 WebSocket 客户端,以及用来把远端状态镜像进 本地 store 的 snapshot action。 * `server/relayServer.js` —— 极简 `ws` 中继:缓存最后一份状态、广播给所有输出端、 忽略输出端发来的状态。健康检查:`GET /health`。 ## 快速开始(中文) 控制界面是中文的;上屏的转播图形保持英文,因为它们是在还原 F1 世界转播信号本身的样子。 **Windows 一键启动**:双击项目根目录里的 **`启动开发服务器.cmd`**。 **命令行启动**: ```bash npm install # 第一次才需要 npm start ``` 然后打开 [localhost:3000](http://localhost:3000)。日常操作都在 **转播控制台**(`/broadcast`)页, 进去以后按 ? 就能看到全部快捷键。 # Demos *Please note that animated images on this page are in WEBP format and may have performance issues (a lowered framerate) depending on your device. Animations are buttery smooth in practice! View the videos below if they're slow for you!* ## Driver Chyrons *"Chyrons"* - Dynamic, animated information boxes. They are used to highlight the current cars on screen to viewers. ### Features * Animated mounting with multiple moving elements * Portraits for all 20 drivers from 2021 * Team colors for elements and driver numbers * Custom fit country and team flags * Retired cars hide their position * Built with CSS and JS timing functions ### Image Gallery *(Click to view full size.)*

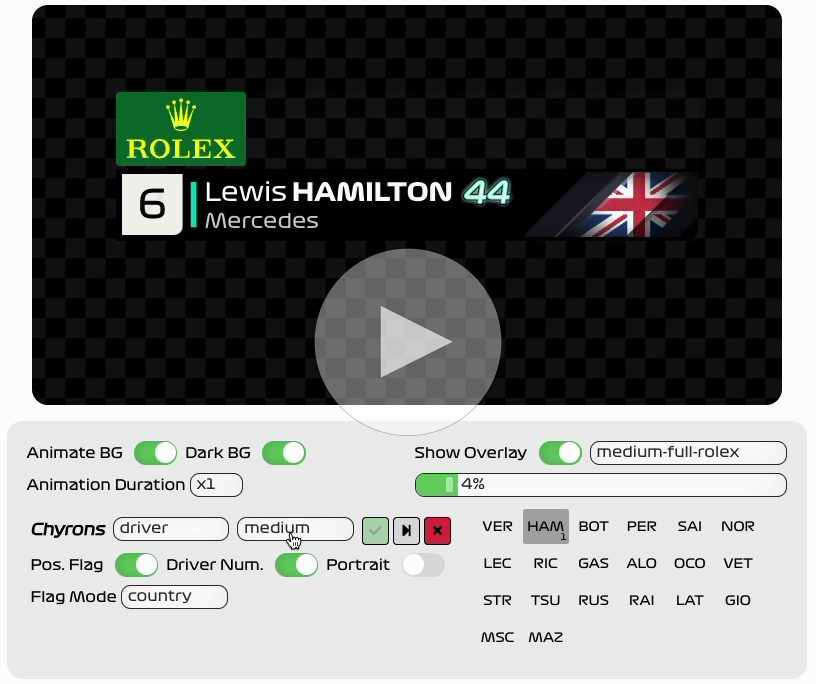
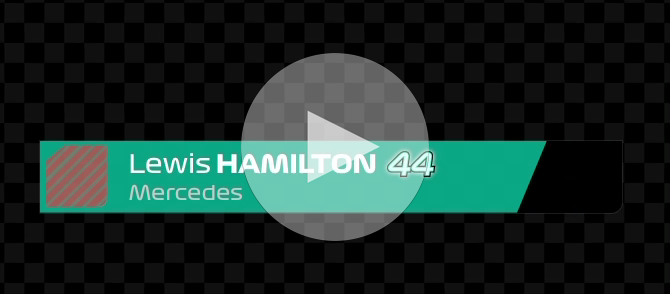
Normal size with portrait and team flag

Normal size with country flag

Normal size with no position

Large size

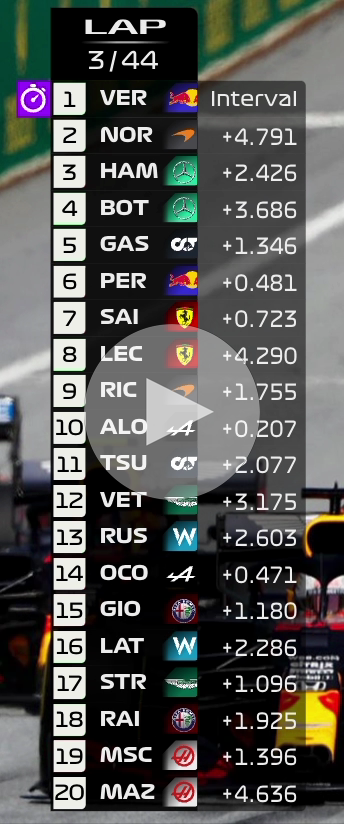
## Timing Board *"Timing Board"* - Constant display of car positions and race progress
Fastest lap award animation Mode changes Animated position changes
### Features * Position changes animate with subtle outline hightlight * Position flags wipe away their color when complete * Fastest Lap indicator with matching animation * Four different display modes: *Hidden*, *Left Only*, *Left + Right*, and *Full Left* * Interval and Leader split times ## Prototype Interface Page elements are prototyped in a shared workspace where new elements can be developed, adjusted, and controlled. ### Video Gallery *(Click to view short video.)*

Workspace interface with custom-made input components

Slow motion up to 1/10th speed

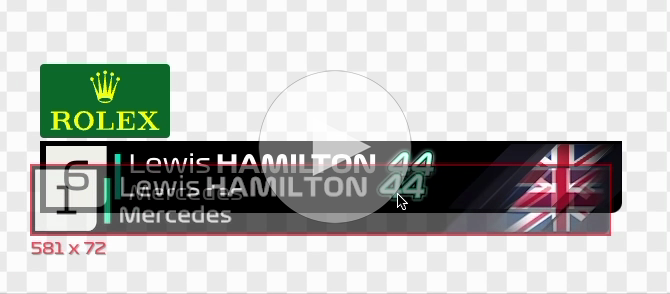
Reference images gathered from official footage can have its position and opacity adjusted to pursue pixel-perfect re-creations
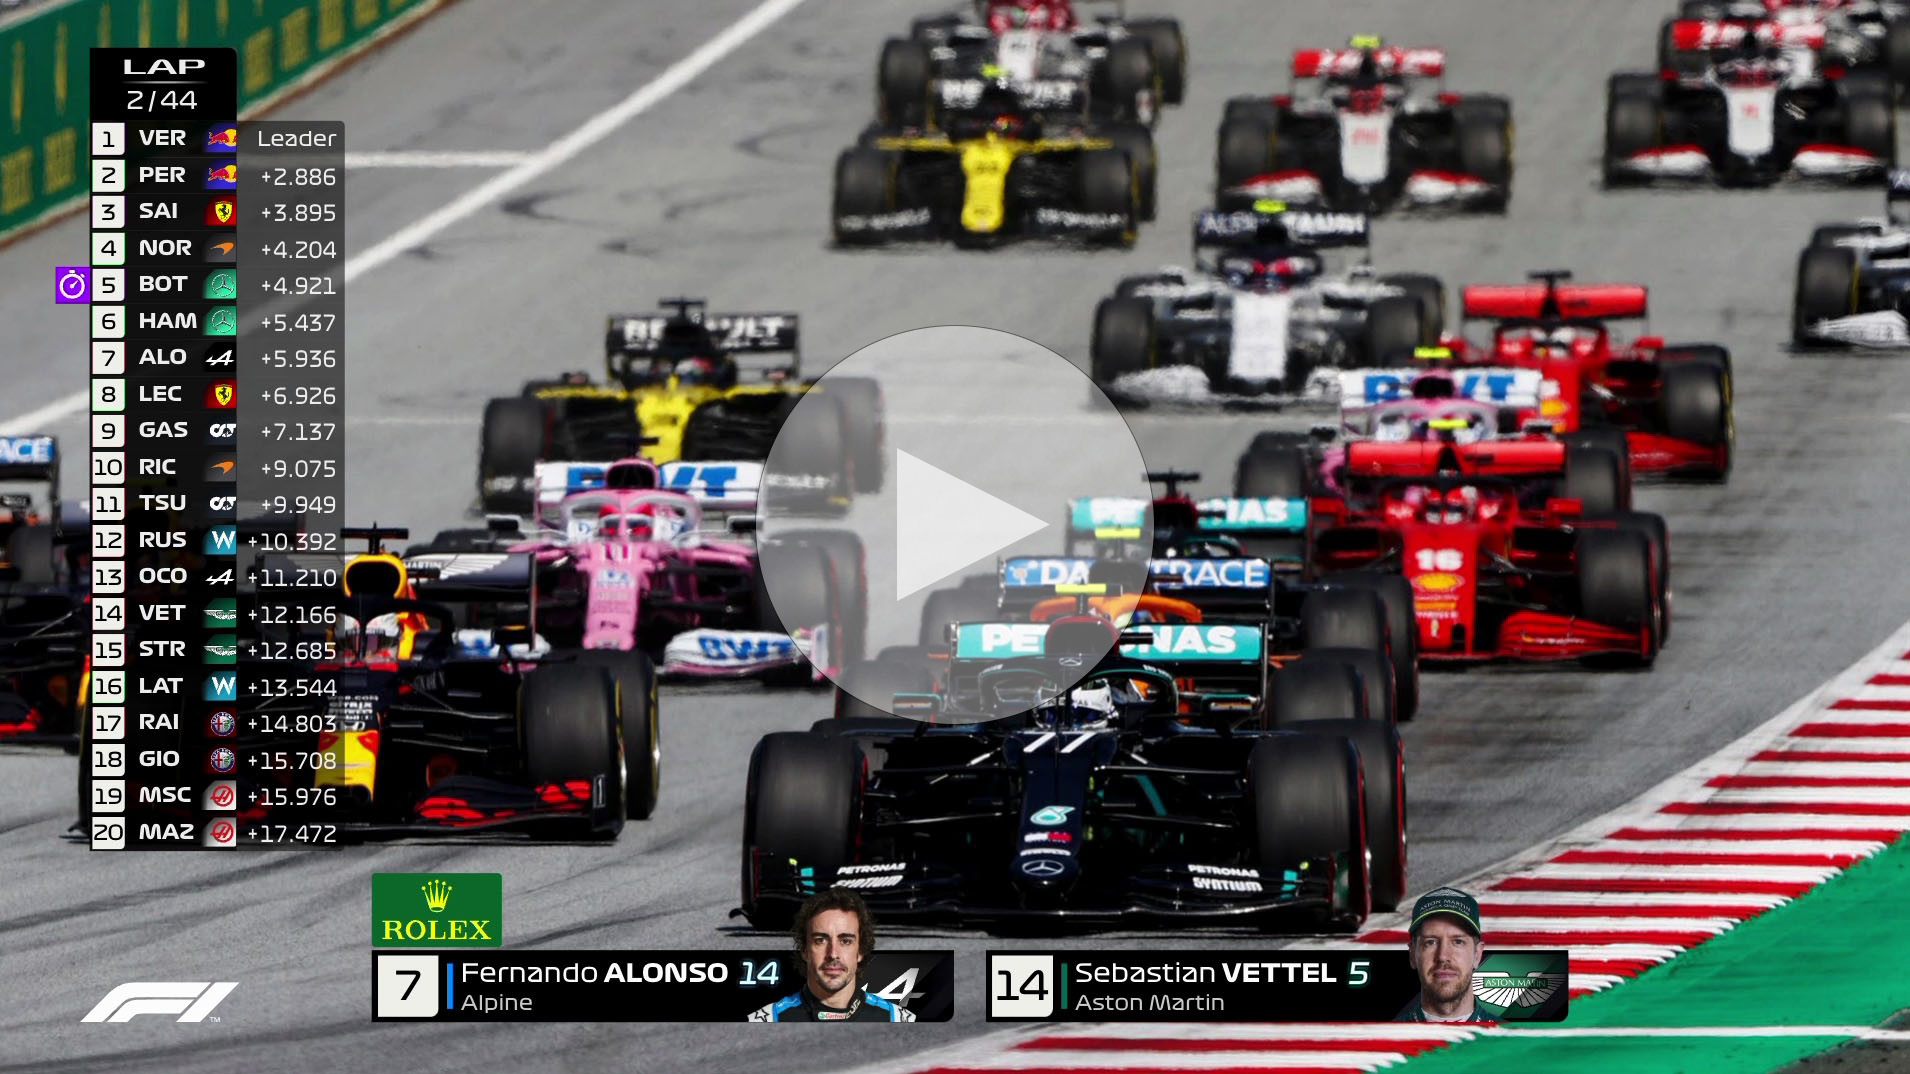
## Broadcast Page The broadcast page is used to emulate the look and feel of the F1 broadcast. The broadcast graphics scale and position correctly based on the size of the browser window. ### Video Gallery *(Click to view short video.)*

Timing Tower

Dual Driver Chyrons

Dynamically scaled 16:9 broadcast frame works with any window size
# What is this... exactly? As strange as this might sound this is a website. Yes, a website like Twitter or Facebook, it's really incredible what kind of cool things you can get up to using HTML, CSS, and JavaScript in a modern web browser. In fact, if you use Discord or Spotify have you ever noticed how much the website interface looks like the desktop client? Well, surprise, the desktop app is actually just the website! Okay, not 100% literally, but they're both written in HTML, CSS, and JavaScript. The desktop version may have more advanced features, but deep down they're mostly the same code running in different environments. This is a tangent but if you want to read more on this check out Discord's technology ["Electron" on Wikipedia](https://en.wikipedia.org/wiki/Electron_(software_framework)). And for Spotify's look at ["Chromium Embedded Framework" on Wikipedia](https://en.wikipedia.org/wiki/Chromium_Embedded_Framework). ## Can I use this in my racing game overlay system or on my livestream? Short answer is: "No. Not even close". While it is certainly possible, in fact, this could be considered a start of such a project, it wasn't what I intended when I started. I'm sorry to say that if this is the reason you're looking into this you might want to spare yourself some time and stop here. I've learned a little bit about, say, using OBS to overlay websites as a transparency on a video feed. But I have no interest nor the time to do such a thing. Literally, if you put a gun to my head and demanded it I would need to work full time perhaps 3-5 months to pull off such an interface and API system to work with whatever interesting combination of tools and programs you fantasize over. If you somehow have the interest AND the skills to do such a thing I fully welcome you to reach out to me and tell me about it. If someone (or a group of people) could continue my work I'd not only give my permission but some of my support as well. # Directing a broadcast The broadcast can be driven without ever touching the mouse. *The control interface is in Chinese. The on-air graphics are deliberately left in English - they replicate the F1 world feed, so `LAP 1/44`, `Leader` and `OUT` stay exactly as a viewer would see them. All interface text lives in the components plus the shared label maps in `src/i18n/labels.ts`.* ## Keyboard control Press `?` at any time (or click the keyboard button next to the chyron buttons) to bring up the list inside the app itself. | Keys | Action | | --- | --- | | `E` | Show / hide the driver roster editor | | `?` | Show / hide the shortcut list | | `Esc` | Close a panel, otherwise close the chyron | | `↑` `↓` | Move the cursor along the running order | | `Home` `End` | Jump the cursor to the leader or the last car | | `Space` | Add or remove the cursor car from the selection | | `1` … `9` `0` | Select the car running in P1 … P10 | | `Shift` + `1` … `0` | Add that car as the second chyron driver | | `X` | Clear the selection | | `Enter` | Show a chyron for the selection, or the cursor car | | `Shift` + `Enter` | Play the next step of the chyron animation | | `Backspace` | Close the chyron | | `[` `]` | Cycle the chyron mode | | `,` `.` | Cycle the chyron sub mode | | `F` | Cycle the flag: country, team, none | | `P` | Toggle the position flag | | `N` | Toggle the driver number | | `O` | Toggle the portrait | | `S` | Start / stop the event | | `R` | Recalculate the running order | | `Shift` + `P` | Send the selected car 200 m up the road | | `Shift` + `O` | Send every car 100 m up the road | | `Shift` + `F` | Award the fastest lap to the selected car | | `D` | Retire / un-retire the selected car | | `T` | Cycle the timing tower display mode | | `I` | Switch between leader and interval splits | | `+` `=` | Push the LAP counter one lap further on | | `-` | Take the LAP counter one lap back | | `C` | Start / pause the show clock beside LAP | | `Shift` + `C` | Back to zero and replay the position script | | `J` | Show / hide the JSON position script | Shortcuts never fire while you are typing in a field, and every press answers with a short toast at the bottom of the screen so you can tell what landed without looking away from the video. The whole list lives in `src/features/keyboard/shortcuts.ts`. The handler beside it implements that same table and the help overlay renders it, so the on-screen documentation cannot drift away from the real bindings. ## Driver roster editor Press `E`, or use the roster button next to the chyron buttons. * First name, last name, three letter code, car number, nationality, team, performance and yellow T-Cam are editable, per car. * The portrait can be pointed at any portrait bundled in `src/public/images/drivers/front`. * Edits are written straight into the event state, so the chyrons and the timing tower redraw as you type - there is no apply step. * `▲` / `▼` move a driver up or down the starting grid, `↺` restores a single driver and `Reset all` restores the shipped 2021 lineup. * The roster is kept in `localStorage` as you edit, and `Export JSON` / `Import JSON` move a lineup between machines. A driver whose fields are never touched behaves exactly as before: the portrait still defaults to the driver's own id, so none of the stock data changed. ## The show clock and the LAP counter The status indicator in the top left corner carries two extra readouts: * **LAP** can be nudged by hand with `+` and `-`. The offset is remembered separately from the lap the simulation derives from the leader's distance, so the two never fight each other. * **The show clock** sits beside it and counts `mm:ss.mmm` from the moment the timing graphics appeared. `C` pauses it, `Shift` + `C` puts it back to zero. ## Position script Press `J` (or the code button beside the chyron buttons) for a JSON schedule of running order changes. Its zero *is* the show clock, so the same file replays identically on every run. ```json { "autoStart": true, "order": ["VER", "HAM", "BOT", "PER", "SAI", "NOR", "LEC", "RIC", "GAS", "ALO", "OCO", "VET", "STR", "TSU", "RUS", "RAI", "LAT", "GIO", "MSC", "MAZ"], "events": [ { "at": "00:05.000", "action": "swap", "drivers": ["HAM", "VER"] }, { "at": "00:12.000", "action": "move", "driver": "LEC", "to": 3 }, { "at": "00:18.500", "action": "lap", "value": 1 }, { "at": "00:24.000", "action": "retire", "driver": "MAZ" }, { "at": "00:31.000", "action": "restore", "driver": "MAZ" } ] } ``` * `at` is milliseconds or `"mm:ss.mmm"` after zero. * `action` is `swap`, `move`, `retire`, `restore` or `lap`. * A driver may be named by id (`verstappen`), code (`VER`), surname (`Verstappen`) or car number (`33`). * `order` is optional and is put back on the track every time the clock resets, which is what makes "Reset & replay" reproduce the same show. * Editing is live: a valid schedule takes effect immediately, an invalid one reports itself and keeps the previous schedule running. Reshuffling gives each car the track position of the rank it moves into, so the gaps - and the interval column - survive untouched, and the timing tower plays its position change animation exactly as it does during a real race. # How to download and run Here I'll do my best to guide you to try this project on your own I'm going to write this assuming you're not at all familiar with programming and software development. But worry not, if you're a properly massive computer nerd you'll probably manage. ## Note about your operating system But do note that I develop on MacOS, which despite its (undeserved) reputation by some to be an operating system for babies and old people is far easier to code on than Windows thanks to its deep relationship to the Unix operating system, a common ancestor to Linux - the operating system preferred by true computer nerds - the kind who make money through their knowledge and abilities. As a result it's my humble estimate that the OS used by JavaScript-writing web developers (in the west at least) probably breaks down to something like 85% MacOS, 8% Windows, and 7% Linux. ## What you'll be doing First I'll have you download Microsoft's VSCode. It's the world's most popular and loved IDE (Integrated Development Environment) - basically an extremely powerful text editor. Entirely free and extremely polished it works flawlessly on Windows, MacOS, and Linux. Then I'll have you install *NodeJS* and enable *yarn*. NodeJS is an engine of sorts that runs JavaScript code on your computer. If you've ever opened up the inspection tab of your desktop browser you might have seen the console tab and find you can write stuff like "1 + 2" and press enter to have it return "3". JavaScript is a computer language that was written for browsers (Netscape, Internet Explorer, Safari, Opera, Firefox, Chrome, Edge - all of theme) to have a shared language that could do cool things on a web page. Well, things got out of hand and sometime in 2009 a guy took Google Chrome's "V8" JavaScript engine and removed it from the metaphorical car that is the Chrome Internet browser. Now entire websites running on Linux server computers are being hosted and controlled by the same "engine" that runs in Chrome. It's a strange thing but it's become very popular. What NodeJS does it is "runs" the website on your computer so that you can then view it in your browser. The old days of simply opening a .html file in your browser really isn't what we do anymore - modern tech requires a lot more horsepower. From there all you'll need to do is use yarn to "install" the project's "packages". Now. Don't get scared about the term "install", it's not going to install a bunch of RAM-sucking spyware or anything like that. No, it'll download thousands and thousands of little text files of JavaScript code that you can delete at any time. Lastly, you'll be able to run and view the website in your browser at [localhost:3000](http://localhost:3000/). ### What I'm skipping If you ever want to contribute to this code you'll need to get your feet wet in the world of Git and GitHub, which is an important, crucial, and intimidating subject. If you want to get started with GitHub please start with their docs [here](https://docs.github.com/en/get-started/quickstart/hello-world). It'll be the way that you can, without relying on downloading and extracting .zip files, can download updated code and, in the future, commit and push code of your own to GitHub. ## The steps 1) Download and install [Microsoft Visual Studio Code](https://code.visualstudio.com/). 1) Download the source code of my project by clicking the green "Code" button near the top of this page and download the .zip file. 1) Unpack the zip file's contents in a very easy-to-find location on your computer. I recommend creating a "git" directory in your personal files folder and making it located at "`/git/sab-f1-ui`". (Also, I really recommend AGAINST placing it in any Dropbox or other cloud storage directory you might have location). 1) Open VSCode and open the `sab-f1-ui` directory as a new project. 1) In VSCode open a terminal (look around the menus at the top of VSCode). 1) Install NodeJS v16.13.0. For MacOS, use "nvm" and follow [this guide](https://github.com/nvm-sh/nvm#installing-and-updating) and [these steps](https://github.com/nvm-sh/nvm#installing-and-updating). For Windows follow [this guide](https://docs.microsoft.com/en-us/windows/dev-environment/javascript/nodejs-on-windows) - if you get errors about "access denied" [try this fix](https://stackoverflow.com/a/63084419); if you get errors about "script execution" [try this fix](https://stackoverflow.com/a/67420296). 1) Run `node -v` and make sure it works and says v16.13.0. 1) Enable `yarn` by running `corepack enable` (more details [here](https://yarnpkg.com/getting-started/install)). If for some reason this isn't working, you can skip it. 1) With the terminal for VSCode open in the `sab-f1-ui` directory run `yarn` (if you didn't get yarn, run `npm install`). This will download all the open source code needed to run my code (expect 300-800 MB download, it's hard to predict). 1) If everything installed correctly, now run `yarn start` (if you didn't get yarn, run `npm start`). 1) If a browser window doesn't open for you automatically, open up a new browser tab and go to [localhost:3000](http://localhost:3000/). Currently 95% of the content of my project is under the "Workspaces" segment. Take a look and play around! If you get bad performance or flashing text its because you're in developer mode. If you want you can try to build the project and serve it in production mode. Run `yarn build` (or `npm build`) and then follow [this guide](https://create-react-app.dev/docs/deployment/#static-server) to find how to install the command line program `serve` and host the static site with `serve -s build`. # My Previous Work ## Accretive Technology Group (2013-2018) I spent the first five years as a professional programmer in Seattle, Washington working as an SDET and later a "support engineer" for a modern web company whose business was in video entertainment streaming. I worked daily alongside web developers but hardly developed any experience building webpages of my own. ## Metric-Teacher (2018) Dissatisfied with the lack of creative output in my work I decided in 2018 to quit that job and spent approximately 8 months working on [Metric-Teacher.com](http://metric-teacher.com) (source code also hosted on GitHub [here](https://github.com/TiE23/metric-teacher)). It is a fully interactive progressive webapp that teaches American users how to intitively use the Metric System modeled as an homage to Duolingo. I learned Fullstack Javascript development, writing both the client and server all from scratch and learned to build, host, and maintain my own complex website. On the client-side I learned ReactJS, Apollo, and how to use GraphQL. On the sever-side I learned NodeJS, SQL database design, and how to build a GraphQL schema. For hosting I became familiar with Docker, Traefik, AWS, and mechanisms for data backup and restoration. ## Meta (formerly Facebook) Contractor (2019-2021) Working at Facebook (or as its now called, Meta) I was hired on for the combination of skills I developed at Accretive and Metric-Teacher. I would develop internal scripts and web tools that facilitated language-localized testing for Facebook's voice assistant product. I didn't learn that much more about React beyond getting familiar with React Hooks. Facebook uses Flow instead of TypeScript and Flux (and other solutions) instead of Redux and has a ton of technical overhead when it comes to the marriage of their own language Hack (an extension of PHP), their cross-language API/RPC framework Thrift, and their configuration files system Configurator to the world of React and JavaScript. ## 2021 Self Teaching My time with Facebook ended in June 2021 and after taking a month to vacation and relax and started by reading through a 660 page long look from cover-to-cover on React and [TypeScript](https://www.typescriptlang.org/) to learn everything I didn't already know (or what came out as the new paradigms - having built Metric-Teacher just before hooks became the norm). Then I learned about composing CSS styles through the [Styled-Components](https://styled-components.com/) system that I have grown to absolutely love. Finally I worked my way through a comprehensive course in [D3.js](https://d3js.org/). And while I haven't found a use for this library in my project it really has left a mark on me and I'm excited for any chance to use it in the future. ## F1 World Broadcast Emulator project I started work on this project in mid December mostly working on the basic scaffolding of the project - routing, state, and getting familiar with general page layout. I then promptly took time off for Christmas and New Years. In January and February I did most of the *interesting* work you see here. While I had in my mind the idea of re-creating most if not all of the graphics you see on F1's broadcasts it's clear to me that a team of trained professionals using specially designed tools had worked on the graphics for some time. So I really had to limit my ambitions and grew to accept that I would learn all I needed to learn by doing just a few segments to a satisfactorily polished level. # Fair Use Disclaimer Copyright Disclaimer Under Section 107 of the Copyright Act in 1976; Allowance is made for "Fair Use" for purposes such as criticism, comment, news reporting, teaching, **scholarship**, and **research**. Fair use is a use permitted by copyright statute that might otherwise be infringing. Non-profit, educational or personal use tips the balance in favor of fair use. All rights and credit go directly to its rightful owners. No copyright infringement intended. In particular: * Mercedes-AMG Petronas Formula One Team * Red Bull Racing Ltd * Ferrari S.p.A * McLaren Racing * RENAULT s.a.s. * AMR GP Limited * Scuderia AlphaTauri S.p.A. * Sauber Group * FCA US LLC * Williams Group * Haas F1 Team * Formula One World Championship Limited * Rolex